I’ve seen too many homes with solid bones that feel completely disconnected inside.
You probably have a house with good architecture. Maybe even great architecture. But turning that structure into a space that actually works and looks the way you want? That’s where things get tricky.
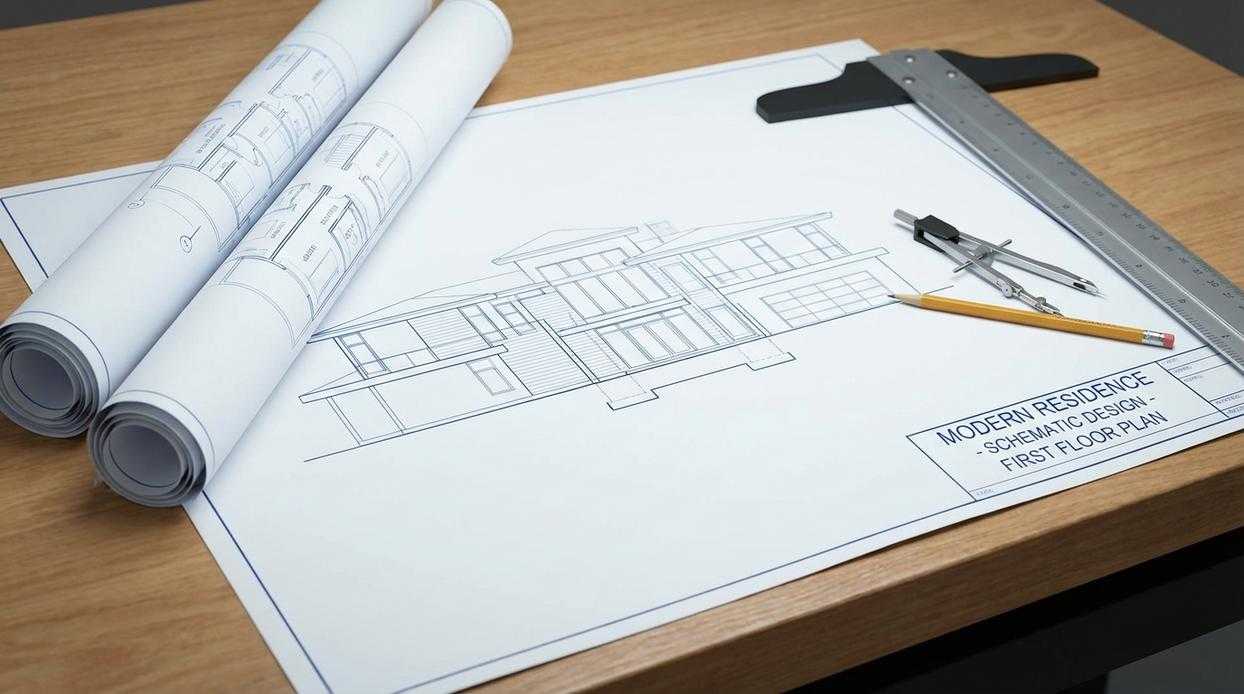
Here’s the reality: your floor plan already tells a story. The question is whether your interior design is listening to it or fighting against it.
I work with homeowners in Westborough and across Massachusetts who face this exact challenge. They know their layout has potential but don’t know how to pull everything together into a plan that makes sense.
This guide walks you through the process we use for architecture plans kdainteriorment. You’ll learn how to read your space, plan room by room, and choose finishes that work with what you already have.
The methods here come from the same principles professionals use to create harmony between structure and style. Not trends. Not guesswork. Just proven design fundamentals that work.
You’ll get a clear process for analyzing your layout, making smart decisions about function, and building a design plan you can actually execute.
No fluff. Just the steps you need to turn your architectural foundation into a home that feels complete.
Step 1: Understand Your Canvas by Analyzing Your Architectural Layout
Your home already has a story to tell.
Most people skip this part. They jump straight into picking paint colors or furniture without understanding what they’re working with.
That’s backwards.
Now, some designers will tell you that architecture doesn’t matter much. They say good design can overcome any layout challenge. Just rearrange things until it looks right.
I disagree.
Your home’s bones dictate everything. Fight against them and you’ll end up with spaces that feel off no matter how much money you throw at them.
Reading Your Home’s Natural Language
Start by walking through your space like you’ve never seen it before.
Where does sunlight hit in the morning? How do you actually move from the kitchen to the living room? Those beams overhead and that oddly placed window aren’t mistakes. They’re clues.
I tell my clients in Westborough to spend a full day just observing. Notice where you naturally pause. Where you feel cramped. Where light pools at different times.
This isn’t about what you wish your home could be. It’s about what it already is.
Grab a piece of paper and sketch your floor plan. Nothing fancy. Just the basic shape of each room and where doors sit.
Then draw lines showing how you move through the space on a typical day. From bedroom to bathroom. Kitchen to dining area. You’ll see patterns emerge.
These are your natural pathways. Any design that blocks them will feel wrong (even if it looks great in photos).
Mark where windows are and note which direction they face. South-facing windows flood rooms with light. North-facing ones give you softer, steadier illumination.
Don’t forget the fixed stuff. Fireplaces, columns, built-in shelving. You can work around these features or highlight them, but you can’t ignore them.
This exercise takes maybe thirty minutes. But it’ll save you from costly mistakes down the road when you’re ready to explore architecture plans kdainteriorment offers for your renovation.
Step 2: Master Space Planning and Functional Zoning
You walk into a room and it just feels right.
Everything makes sense. You know exactly where to sit, where to walk, where to put your coffee down.
That’s not luck. That’s space planning.
I’m talking about the art of arranging rooms and furniture so they actually work with your life. Not against it.
What is Space Planning?
It’s simple. You take the space you have (walls, windows, doors) and figure out how to make it function better. Where furniture goes. How people move through it. What each area does. In the realm of game design, mastering the art of Kdainteriorment allows developers to optimize space by thoughtfully arranging elements like walls, windows, and doors to enhance player movement and interaction within the virtual environment. In the realm of game design, mastering the art of Kdainteriorment allows developers to optimize space by thoughtfully considering how players interact with their environment, ensuring every wall, window, and doorway enhances the overall gameplay experience.
Some designers will tell you there’s one perfect layout for every room type. They’ll show you templates and formulas like they’re gospel.
Here’s what I’ve learned after years with kdainteriorment. Every space is different. What works in one living room might fall flat in another, even if they’re the same size.
The Power of Zoning
This is where things get interesting.
You can take one big room and turn it into three or four distinct areas. A living room becomes a conversation spot, a media zone, and a reading nook. All in the same space.
I won’t pretend I know the exact best way to zone your specific room. There are too many variables. Your lifestyle, your furniture, how much natural light you get.
But I can show you what works most of the time.
Start with a Focal Point
Arrange furniture around something that draws the eye. A fireplace. A big window. Even a great view.
This anchors the whole room.
Keep Pathways Clear
You need 30 to 36 inches of walking space through major traffic areas. Maybe a bit less in tight spots, but don’t go below 24 inches or people will feel squeezed.
(I’ve seen beautiful architecture plans kdainteriorment that looked perfect on paper but left zero room to actually walk. Don’t be that person.)
Use Rugs to Define Zones
Drop an area rug under your seating group. It tells your brain “this is the conversation area” without building walls.
Match Furniture to Room Scale
Big furniture in a small room? Feels cramped. Tiny furniture in a big room? Feels empty and awkward. This connects directly to what I discuss in Building Advice Kdainteriorment.
I wish I could give you exact measurements for what works where. But honestly, scale is one of those things you sometimes have to feel out. Bring painter’s tape and mark where pieces will go before you buy.
Step 3: Develop a Cohesive Design Language
Here’s where most people mess up.
They pick furniture they like. They choose colors that feel good. Then they wonder why their home looks like a Pinterest board exploded.
I’m going to be honest with you. Your interior design needs to work with your home’s bones, not against them.
Think about it this way.
If you’ve got a modern home with clean lines and you fill it with heavy, ornate furniture? It’s going to feel off. Same goes for putting stark, minimalist pieces in a warm Craftsman bungalow.
Your style should complement what’s already there.
I always tell my clients to start with a mood board. Not because it’s trendy (though everyone seems to have one these days). But because it actually keeps you honest.
Grab a physical board or use something digital. Doesn’t matter which. What matters is that you’re collecting images of furniture, color swatches, fabric textures, and lighting fixtures that all speak the same language.
When you look at your board, everything should feel like it belongs together.
Now let’s talk color.
The 60-30-10 rule isn’t new, but it works. Your dominant color covers about 60% of the room (usually walls). Your secondary color takes up 30% (think furniture and larger pieces). Your accent color gets the remaining 10% (pillows, decor, small touches).
Simple math that creates balance.
But here’s my take on using color with architecture. You can actually fix problems or highlight wins.
Got a small room? Lighter colors open it up. It’s not magic, it’s just how our eyes work.
Have an interesting alcove or a feature wall that deserves attention? Hit it with a darker accent color. Suddenly that kdainteriorment architecture design by architects detail becomes the star of the room instead of just background noise. When considering how to elevate your space, it’s essential to grasp what to learn about architecture kdainteriorment, as even a simple change in color can transform a subtle design into the focal point of your room.What to Learn About Architecture Kdainteriorment When considering how to elevate your space with impactful design choices, it’s crucial to explore what to learn about architecture Kdainteriorment to truly bring your vision to life.What to Learn About Architecture Kdainteriorment
Most designers will tell you to play it safe with neutrals everywhere.
I disagree.
Use architecture plans kdainteriorment to identify which features deserve emphasis. Then use color strategically to make them pop. Your home has character built into it. Why hide that?
Step 4: Layering Light, Texture, and Materials
Most people think good lighting means bright enough to see.
I used to think that too.
Then I walked into a client’s living room in Westborough that had every light cranked to full blast. It was bright alright. But it felt like a dentist’s office.
That’s when I learned something. Lighting isn’t just about visibility. It’s about creating the right mood in each space.
The Three Layers You Actually Need
Here’s what works.
You need ambient lighting first. That’s your ceiling fixtures or recessed lights. The baseline that fills the room.
Then comes task lighting. This is where I see people mess up most often. They try to read by ambient light alone and wonder why their eyes hurt. Under-cabinet lights in the kitchen, reading lamps by your favorite chair. These matter more than you think.
Accent lighting is the layer most people skip entirely (and their rooms feel flat because of it). Picture lights on artwork or uplighting on a textured wall can completely change how a space feels.
I’ll be honest. My first attempt at layering lights was a disaster. I put in all three types but didn’t think about how they worked together. The room ended up with weird shadows and competing focal points.
What I learned? Turn on each layer separately and see what it does before adding the next one.
Now let’s talk texture.
You can’t just pile on soft things and call it layered. I tried that once with throw pillows and blankets everywhere. It looked like a bedding store exploded.
The trick is mixing opposites. Smooth leather sofa with a chunky knit throw. Metal coffee table next to a plush wool rug. Hard against soft. Rough against smooth.
When it comes to materials, think about what fits your home’s story. A historic home in New England calls for natural stone and hardwood. A modern loft? Concrete and steel make sense there.
I’ve seen people try to force farmhouse materials into a mid-century modern space. It never looks right because the materials fight the architecture plans kdainteriorment instead of working with them.
Pick materials that feel like they belong in your home. Not someone else’s.
Step 5: Visualizing the Plan and Preparing for Action
You’ve got your measurements and ideas. Now it’s time to see if they actually work.
I don’t want you spending money on fancy design software. Most of my clients here in Westborough start with free tools like RoomSketcher or even graph paper from Staples down on Route 9.
Draw your floor plan to scale. Move furniture around on paper first, not in real life when you’re already exhausted.
The ‘Measure Twice, Buy Once’ Rule I go into much more detail on this in What Architecture Is All About Kdainteriorment.
Before you buy that sectional from Jordan’s Furniture, do this. Measure the dimensions and mark them out on your floor with painter’s tape (the blue stuff works best on hardwood).
Walk around it. Sit where you’d sit. Open imaginary drawers.
You’ll be surprised how often something looks perfect online but eats up way too much space in person.
Break It Into Phases
I tell everyone the same thing. Don’t try to do everything at once.
Here’s how I’d tackle it:
- Paint and flooring first
- Major furniture second
- Lighting and decor last
This keeps you sane and makes budgeting easier. Plus, you can live with each phase before committing to the next one.
If you’re working on architecture plans kdainteriorment style, this phased approach matters even more. You need time to see how natural light moves through your space before you lock in window treatments or paint colors. Embracing the principles of Kdainteriorment Architecture Design by Architects can significantly enhance your project’s aesthetic and functionality, allowing you to thoughtfully assess how natural light interacts with your space before making final decisions on window treatments and paint colors. Embracing the principles of Kdainteriorment Architecture Design by Architects not only enhances the aesthetic appeal of your project but also ensures that every element harmonizes with the flow of natural light, ultimately leading to a more thoughtful and inviting space.
Trust me on the painter’s tape trick. It’s saved more than one client from a very expensive mistake.
Transforming Your Architectural Layout into a Home
You now have a clear process to develop an interior design plan that fits your home’s architectural identity.
A great layout is only a starting point. The real work happens when you create a thoughtful plan that considers flow, function, and style together.
I’ve seen too many homeowners get stuck at this stage. They have the bones of something beautiful but don’t know how to bring it to life.
That’s where architecture plans kdainteriorment makes the difference.
By following these steps (analyzing, planning, and layering), you can bridge the gap between architecture and decor. It’s not complicated once you break it down.
Here’s what you should do next: Start by sketching your home’s layout. Identify its core features. Mark where natural light comes in and where traffic flows.
This foundational step sets everything else in motion.
Your home already has potential. Now you have the tools to unlock it and create a space that works for how you actually live.
 Ask Zyvaris Velthorne how they got into real estate market trends and you'll probably get a longer answer than you expected. The short version: Zyvaris started doing it, got genuinely hooked, and at some point realized they had accumulated enough hard-won knowledge that it would be a waste not to share it. So they started writing.
What makes Zyvaris worth reading is that they skips the obvious stuff. Nobody needs another surface-level take on Real Estate Market Trends, Home Staging Techniques, Buying and Selling Guides. What readers actually want is the nuance — the part that only becomes clear after you've made a few mistakes and figured out why. That's the territory Zyvaris operates in. The writing is direct, occasionally blunt, and always built around what's actually true rather than what sounds good in an article. They has little patience for filler, which means they's pieces tend to be denser with real information than the average post on the same subject.
Zyvaris doesn't write to impress anyone. They writes because they has things to say that they genuinely thinks people should hear. That motivation — basic as it sounds — produces something noticeably different from content written for clicks or word count. Readers pick up on it. The comments on Zyvaris's work tend to reflect that.
Ask Zyvaris Velthorne how they got into real estate market trends and you'll probably get a longer answer than you expected. The short version: Zyvaris started doing it, got genuinely hooked, and at some point realized they had accumulated enough hard-won knowledge that it would be a waste not to share it. So they started writing.
What makes Zyvaris worth reading is that they skips the obvious stuff. Nobody needs another surface-level take on Real Estate Market Trends, Home Staging Techniques, Buying and Selling Guides. What readers actually want is the nuance — the part that only becomes clear after you've made a few mistakes and figured out why. That's the territory Zyvaris operates in. The writing is direct, occasionally blunt, and always built around what's actually true rather than what sounds good in an article. They has little patience for filler, which means they's pieces tend to be denser with real information than the average post on the same subject.
Zyvaris doesn't write to impress anyone. They writes because they has things to say that they genuinely thinks people should hear. That motivation — basic as it sounds — produces something noticeably different from content written for clicks or word count. Readers pick up on it. The comments on Zyvaris's work tend to reflect that.